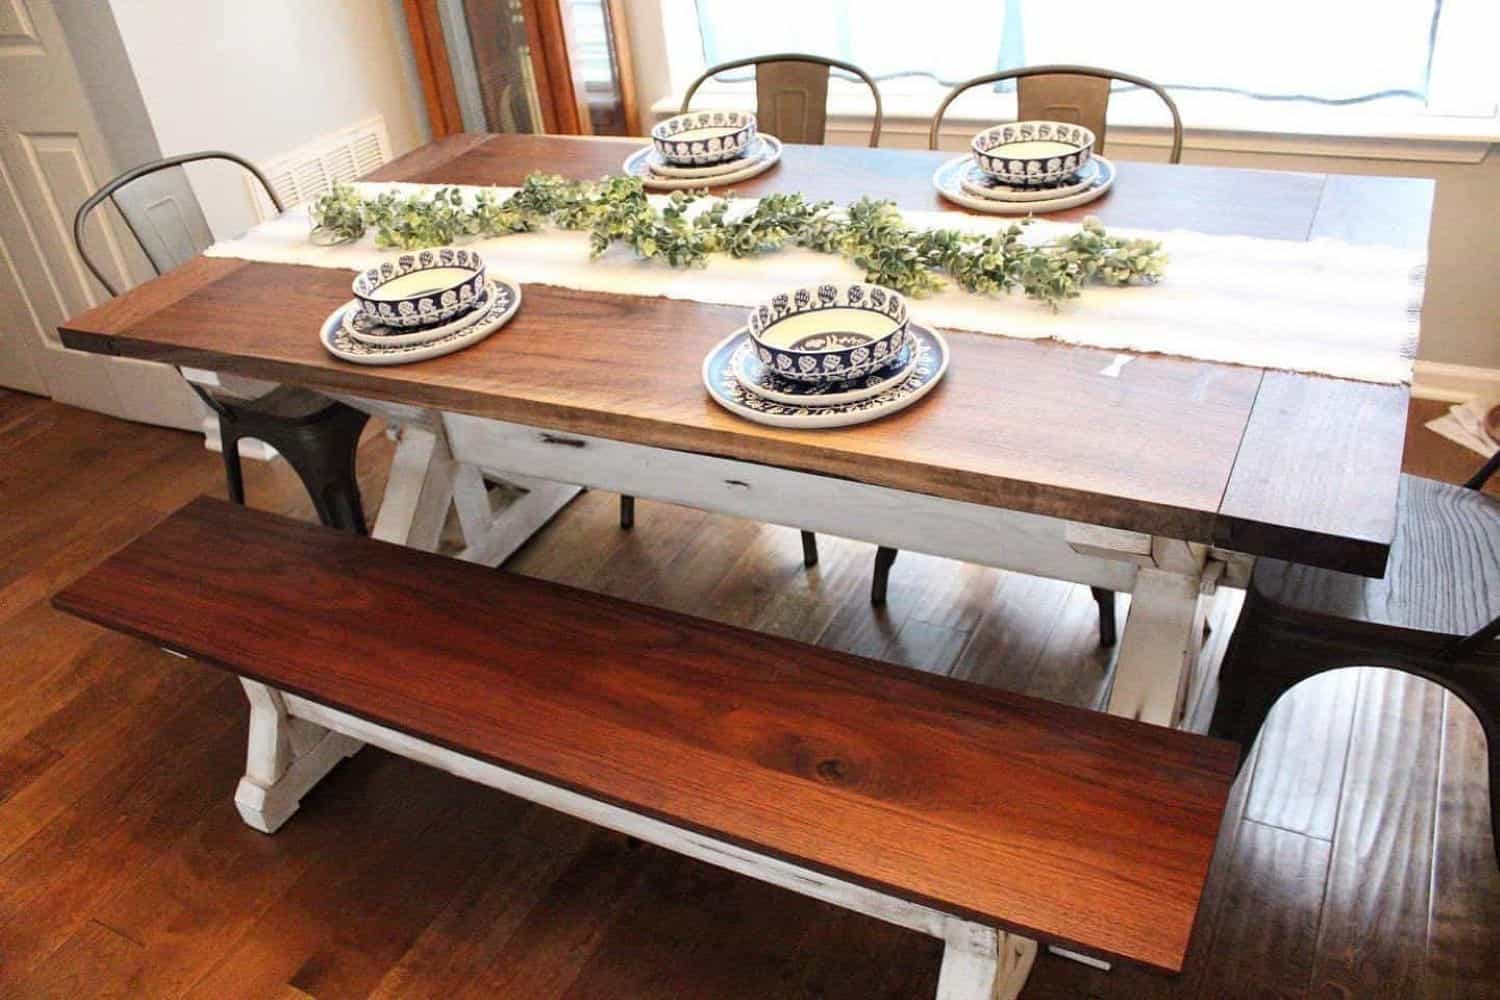
The Early Days of our Family owned and operated woodshop.

Our woodshop actually started from a much simpler place. In fact, it was born of necessity: my family’s home needed new furniture.
It was when I got to work preparing pieces for my wife, my two growing boys, and our home that the idea for Clines Crafted Woodworking LLC took form.
As I sought out fine local woods, studied the most influential woodworkers, and honed my techniques, I was actually sowing the seeds for what would become our family-owned business.
I wanted to make sure the furniture I made for them was the best...
Because our families deserve the best.
They deserve our effort and time, however we can give it to them. And that’s what went into the founding ethos of Clines Crafted Woodworking LLC when we launched it in 2018.
Read more about us on our about page!
Since then our small business has had a couple ups and a lot of downs.
With the growth of any business there is always change and that's why we have finally came to the realization that, as much as we love building all types of furniture, including our popular Entry way Hall Tree and Cedar Bottom Blanket Chests, we have came to love designing and building dining room tables more than any other piece. Click here to check our current dining room table designs.
In our family we spend an abundant amount of our family time around our dining table making memories and traditions.
Lets face it, there could be an argument made that more time around the dinner table as a family may just be what our new age society is missing.
We want to be a part of that, even if it is just a small part!
This blog and the articles in it feature designs of furniture that we will be moving away from offering on our website. While we will always provide our services extensively to past customers these items will slowly retire from our ecommerce page to this blog.
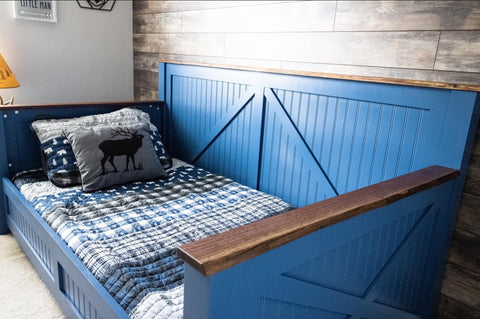
The first design from our collection we will be retiring will be this beautiful day bed. When our first son was born in 2018 he practically lived in the woodshop and we couldn't wait to build some handmade furniture to suite his personality. In early 2020 as the pandemic quarantine was just kicking off we had the perfect opportunity to do just that.
Our Design
As I ventured into the craft of woodworking the design of furniture is what interested me the most. I read hundreds of articles about furniture design and the lives of craftsmen throughout time. What really intrigued me was the fact that a lot of these great designs had withstood the test of time for generations and generations. Some even as far back as ancient Egypt and the furniture found in the pyramids.
I learned about a mortise and tenon joint, bread board ends and even something called the golden ratio but these are all a topic for another day. I quickly became consumed with the desire to learn and understand the common characteristics of these long lasting pieces that allowed them to withstand the test of time. And with that came my love of wood joinery and my desire to master these techniques.
With this understanding I quickly realized that every piece had to be designed all the way through and somewhat pondered on and compared against the pieces from these past craftsmen before it was ever begun in order for it to be the best it could be.
In this modern world we have developed some amazing technologies that can really help with this step. One of these being a software called Fusion 360. At CCW we use Fusion 360 to design our furniture giving us the ability to see it in 3D and also show our valued customers almost exactly what there piece with their dimensions will look like.
So this is where I turned when I first began to think of building my sons bed. And after many changes and a lot of days thinking and reviewing with my wife, Clines Crafted Woodworking's biggest fan, we decided on a day bed design.
Selecting the Wood Species: Poplar
Selecting a wood species for a piece isn't just a blind pick. You see, each wood species will come with their own characteristics. This includes hardness or durability, color, and features of the grain. All of which are factors when it comes to the cost of that particular species.
On a side note, on the customer end its important that if you are getting a handmade piece for yourself that you choose a craftsmen that understands this. This can be the difference in making your piece perfect or something like the grain not being just right, or even the difference of hundreds of dollars.
Rough lumber isn't priced like, what's called, dimensional lumber which is just a technical way of saying the wood you find at your local big box like Lowes or Home Depot. Rough Lumber is priced by what is called a Board Foot which is often times abbreviated as BF.
Sounds difficult but its simply a volume amount. For example 1 BF, or 1 board foot, is simply 144 cubic inches. Simply put a perfect, easy to measure, 1 Board foot would be a 1 inch thick by 12 inch wide by 12 inch long piece of wood. Still a bit confused? Check out this article that explains it better than could ever wish to.
Rough lumber can range from $2 for this 1 BF all the way up to $16 per BF or even more in some areas where supply struggles to meet demand. Once this is understood its easier to see how the cost of materials can change the cost of a handmade piece very quickly.
I knew from the beginning that this bed I would be building for my son would be painted. Poplar being on the low end of the pricing for rough lumber was the obvious choice. Poplar is on the soft end of the woods that are considered Hardwoods. It is still slightly harder than pine without the extensive amount of knots you will find in pine. This made it a perfect match for a painted piece like this.
With this choice of wood species made it was time to head to our local saw mill.
A Saturday morning in the woodshop with a fresh cup of coffee and pile of rough cut lumber!!! Doesn't get any better than that for a craftsman. To make it even better all of our lumber is sustainably harvested locally right here in Kentucky.
From Rough to refined.
Next we took all this beautiful rough poplar and cut it down to close to the dimensions of our parts from our design. Then using a jointer and planer we milled them to be perfectly square and flat.
Building the Parts
Now this is where the fun begins. Piece by piece we cut and fitted each joint using loose mortise and tenon. This joinery technique results in a small piece or multiple pieces of wood going into each piece of wood at each joint. When glued up this makes a joint that is as permanent as it gets. For this reason its important that each piece is test fitted prior to adding any wood glue.
Painting the panels inserts
As you may or may not know wood moves.... Yep, it sure does. You remember that old door that is sticky in the summer but isn't in the winter? Well that's what's known as wood movement. When the humidity in your home changes wood will absorb or release that moisture causing it to expand or contract.
The panel (white part) you see in the photos above rides in a grove in the perimeter pieces. As the wood expands or contracts throughout the seasons you will see more and less of that panel. Though meniscal its important to realize at this point before gluing this piece up. Since this piece will be painted blue if we where to assemble it and paint just what we could paint of the panel, when the wood frame contracts as the humidity decreases in the winter you would see that white around the edges and it would likely stick out like a sore thumb.
Now you may think, well, why doesn't this happen with other pieces I may have bought at the big box store." Well... its very likely that its due to it not being made of real or solid wood. This is one of many reasons why a lot of furniture producers have moved away from real wood.
With all this being said, once we got all the joinery just right we dissembled every piece and painted these panels to solve this problem.
Assembly
With all our t's crossed and I's dotted it was time for and glue and clamping. Half a dozen parts plus joinery, can result in quite the balancing act when its glue up time. Thankfully my loving wife give me a hand with this step.
Obviously we had to be able to take this bed apart to move it so for that we used a connecter that goes into a mortise and expands, much like a wall anchor. Screwing another piece of the connecter into it expands it causing it to get tighter. On the receiving piece is a mortise and hole that incases a locking mechanism that pulls the pieces together. If you're interested in learning more about them click here.
Coming together.
When it came to the slats we capitalized on a technique called dovetails to further strengthen the entire bed, specifically in the direction of the connectors mentioned in the previous steps.
And finally we were able to see it completely put together!!
One last step was the trim pieces that would go horizontally on top of the sides and headboard, or would it be a back board...... the larger piece!!
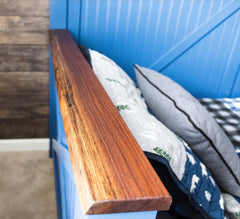
Of course, for our baby boy, this couldn't be anything normal so we went with live edge walnut!
I used the connectors on these trim pieces to to allow us to replace them to something simpler if we ever needed to.
Finishing
Now it was time for this piece to really come to life! We had picked a beautiful bright color called Egyptian blue for the paint. The live edge walnut, like most live edge does, had some voids which we filled with black super clear epoxy. Following this we finished the walnut with Rubio Monocoat pure.
And with that this beauty was a wrap! I hope you enjoyed!
While we withheld the tears, there was a lot of sweat and even a small amount of blood this piece is not only special to us because it was for our sweet boy but we went on to enter this into a nationwide competition sponsored by woodworking network between craftsmen, under 35 years of age, all across the USA and we where humbled to have this piece place in the top 10 in the 2020 competition!
Be sure to drop any comments or questions in the comment section below!
Thanks for reading!
Dan
- Check out these 7 American made tools we used on this piece!
-
Clines Crafted Woodworking: A Kentucky startup handmade furniture business and how it happened
